
How to Train Workshop Operators on Automatic Return Systems in Under 2 Hours
A practical step-by-step onboarding protocol for furniture factory managers. Transition your edge banding team from a 3-worker manual catching bottleneck to a high-efficiency single-operator automated return loop within one morning.
The Shift: Replacing the 3-Worker Manual Catching Bottleneck
In conventional custom furniture workshops, heavy-duty linear edge banders inevitably require two to three workers per shift:
- Worker 1 (Infeed): Feeds panels into the machine infeed fence.
- Workers 2 & 3 (Outfeed Catchers): Stationed at the discharge mouth to catch heavy boards, rotate them manually, or stack them on pallet carts for the next edge pass.
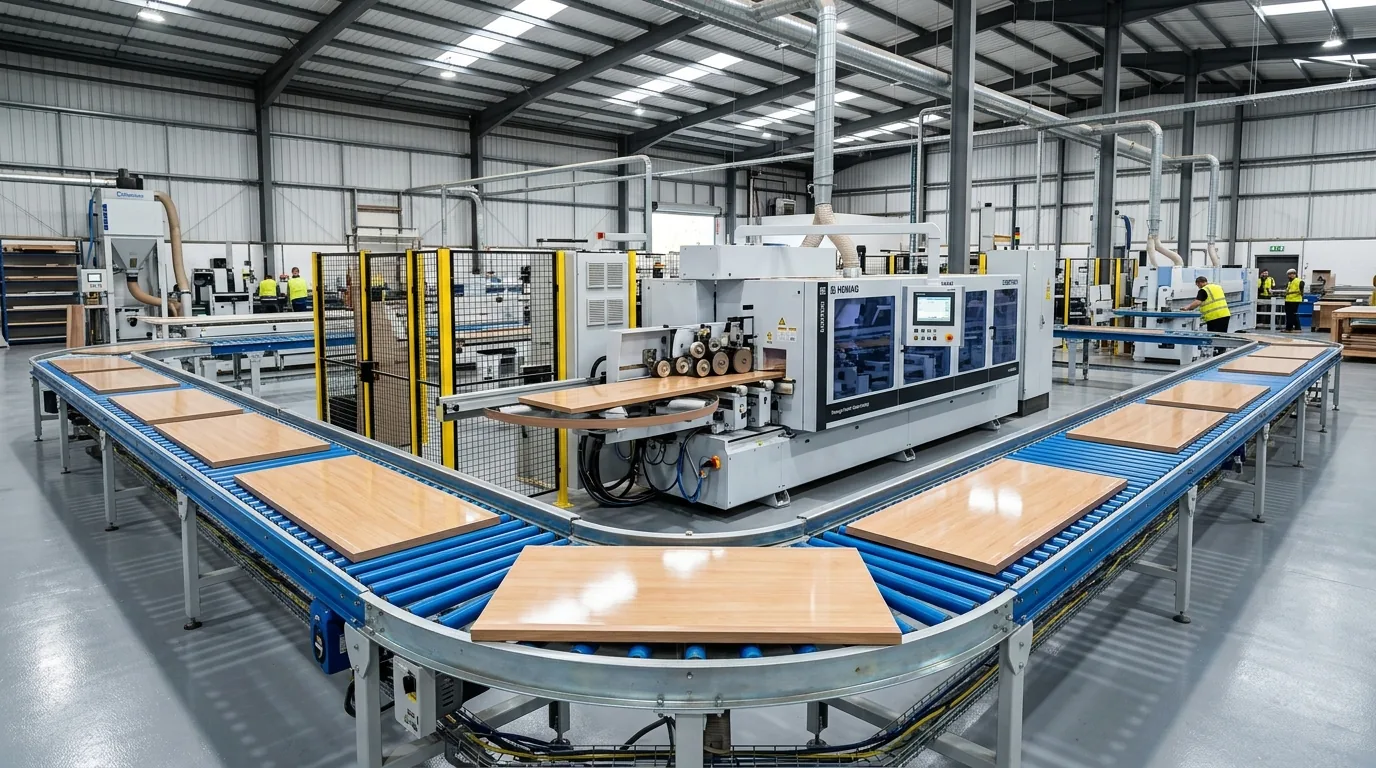
Integrating an Automatic Edge Banding Loop Return Powered Roller Table (SX-EB-030) eliminates manual catching entirely. The panel automatically discharges, transfers across pop-up powered belts, traverses the return lane, and returns directly to the operator’s hands.
💡 Why Operator Resistance Happens (And How to Solve It)
Machine operators accustomed to manual handling often worry about panel collisions, timing mismatches, and scratched surfaces. A structured, hands-on 2-hour onboarding curriculum removes fear and builds confidence through muscle memory.
Pre-Training Workshop Checklist
Before gathering operators around the machine cell, verify these baseline mechanical readiness checkpoints:
- Host Interlock Signal Verification: Confirm dry-contact auxiliary cables between the edge bander PLC and the return conveyor are engaged.
- Pneumatic Pressure Stability: Ensure workshop main line pressure delivers a continuous 0.6 to 0.8 MPa.
- Sample Test Pallet Prepared:
- Small Parts: $250 \times 120 \text{ mm}$ (drawer boxes)
- Medium Cabinets: $800 \times 600 \text{ mm}$ (standard carcases)
- Large Wardrobe Sides: $2400 \times 600 \text{ mm}$ ($18\text{mm}$ MDF / Particleboard)
2-Hour Training Schedule at a Glance
Phase 1: Safety & Optical Alignment
E-stop pull cables, sensor dust cleaning, pressure checks.
Phase 2: Touchscreen & Speed Ratio
Inverter tuning, auto-sensing logic, +15% speed differential.
Phase 3: Panel Circulation Drills
Small drawer sides, 2400mm doors, zero-scratch PET runs.
Phase 4: Daily Shift Protocol
Preventive checklist, glue cleanup, operator sign-off.
Phase 1: Machine Safety, E-Stops & Optical Alignment (Minutes 0 - 30)
Safety training must be physical, not theoretical. During the first 30 minutes, train the operator directly on boundary awareness:
-
Emergency Stop Reset Drills:
Walk the perimeter of the return track with the operator. Demonstrate that pulling the red perimeter cable stops both the return conveyors and signals the host edge bander infeed gate to halt feeding. Have the operator reset the safety relay three times independently. -
Photoelectric Sensor Lens Cleaning:
Show the trainee the optical transmitter and receiver heads at the transfer junction. Airborne sawdust or loose edge-trim strips can occlude the infrared beam, generating false “panel jam” alarms. Teach operators to wipe lenses with a dry microfiber cloth at each shift start. -
Pneumatic Water Trap Inspection:
Locate the air service unit. Verify the dial reads $\ge 0.6 \text{ MPa}$. Show operators how to purge the water condensation valve to keep pop-up pneumatic cylinders operating smoothly.
Phase 2: Touchscreen Interface & Infeed Speed Matching (Minutes 30 - 60)
The return system utilizes an intuitive industrial HMI touchscreen designed for shop-floor simplicity:
- Auto Mode: Rollers and transfer belts activate only when an optical sensor detects a panel. This saves up to $35%$ in electrical energy and eliminates idle roller surface wear.
- Manual Mode: Allows individual roller segments and pop-up belt lifts to be jogged independently during maintenance.
💡 The Golden Speed Ratio Rule
If the edge bander feeds at $18 \text{ m/min}$, set the return conveyor inverter between $20 \text{ and } 22 \text{ m/min}$ ($+10% \text{ to } +20%$ faster).
This speed buffer ensures the leading panel has cleared the return intersection well before the trailing panel exits the edge bander trimming station.
Phase 3: Live Panel Circulation Drills (Minutes 60 - 100)
Now heat the glue pots and begin hands-on material circulation.
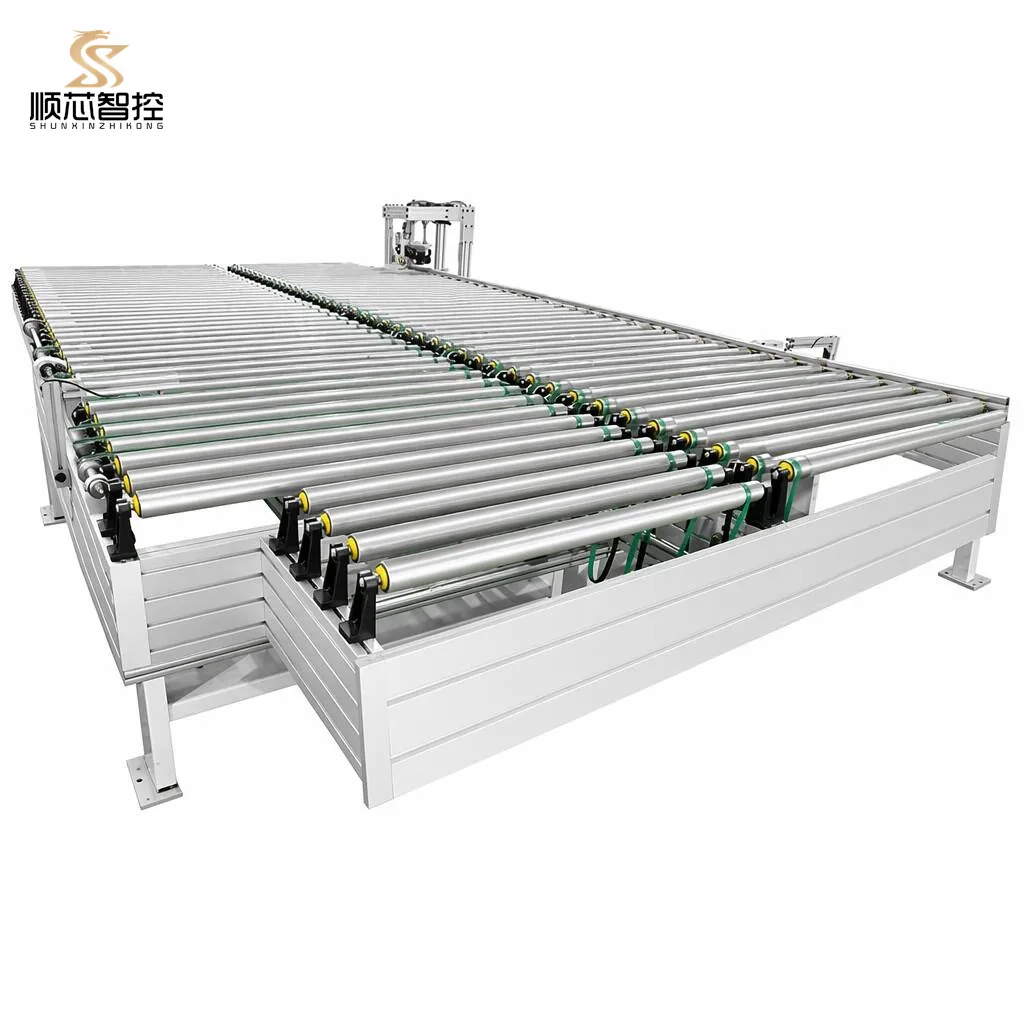
Pneumatic cylinders lift high-friction synchronous belts to shift the panel 90° horizontally onto the return conveyor without corner blowouts.
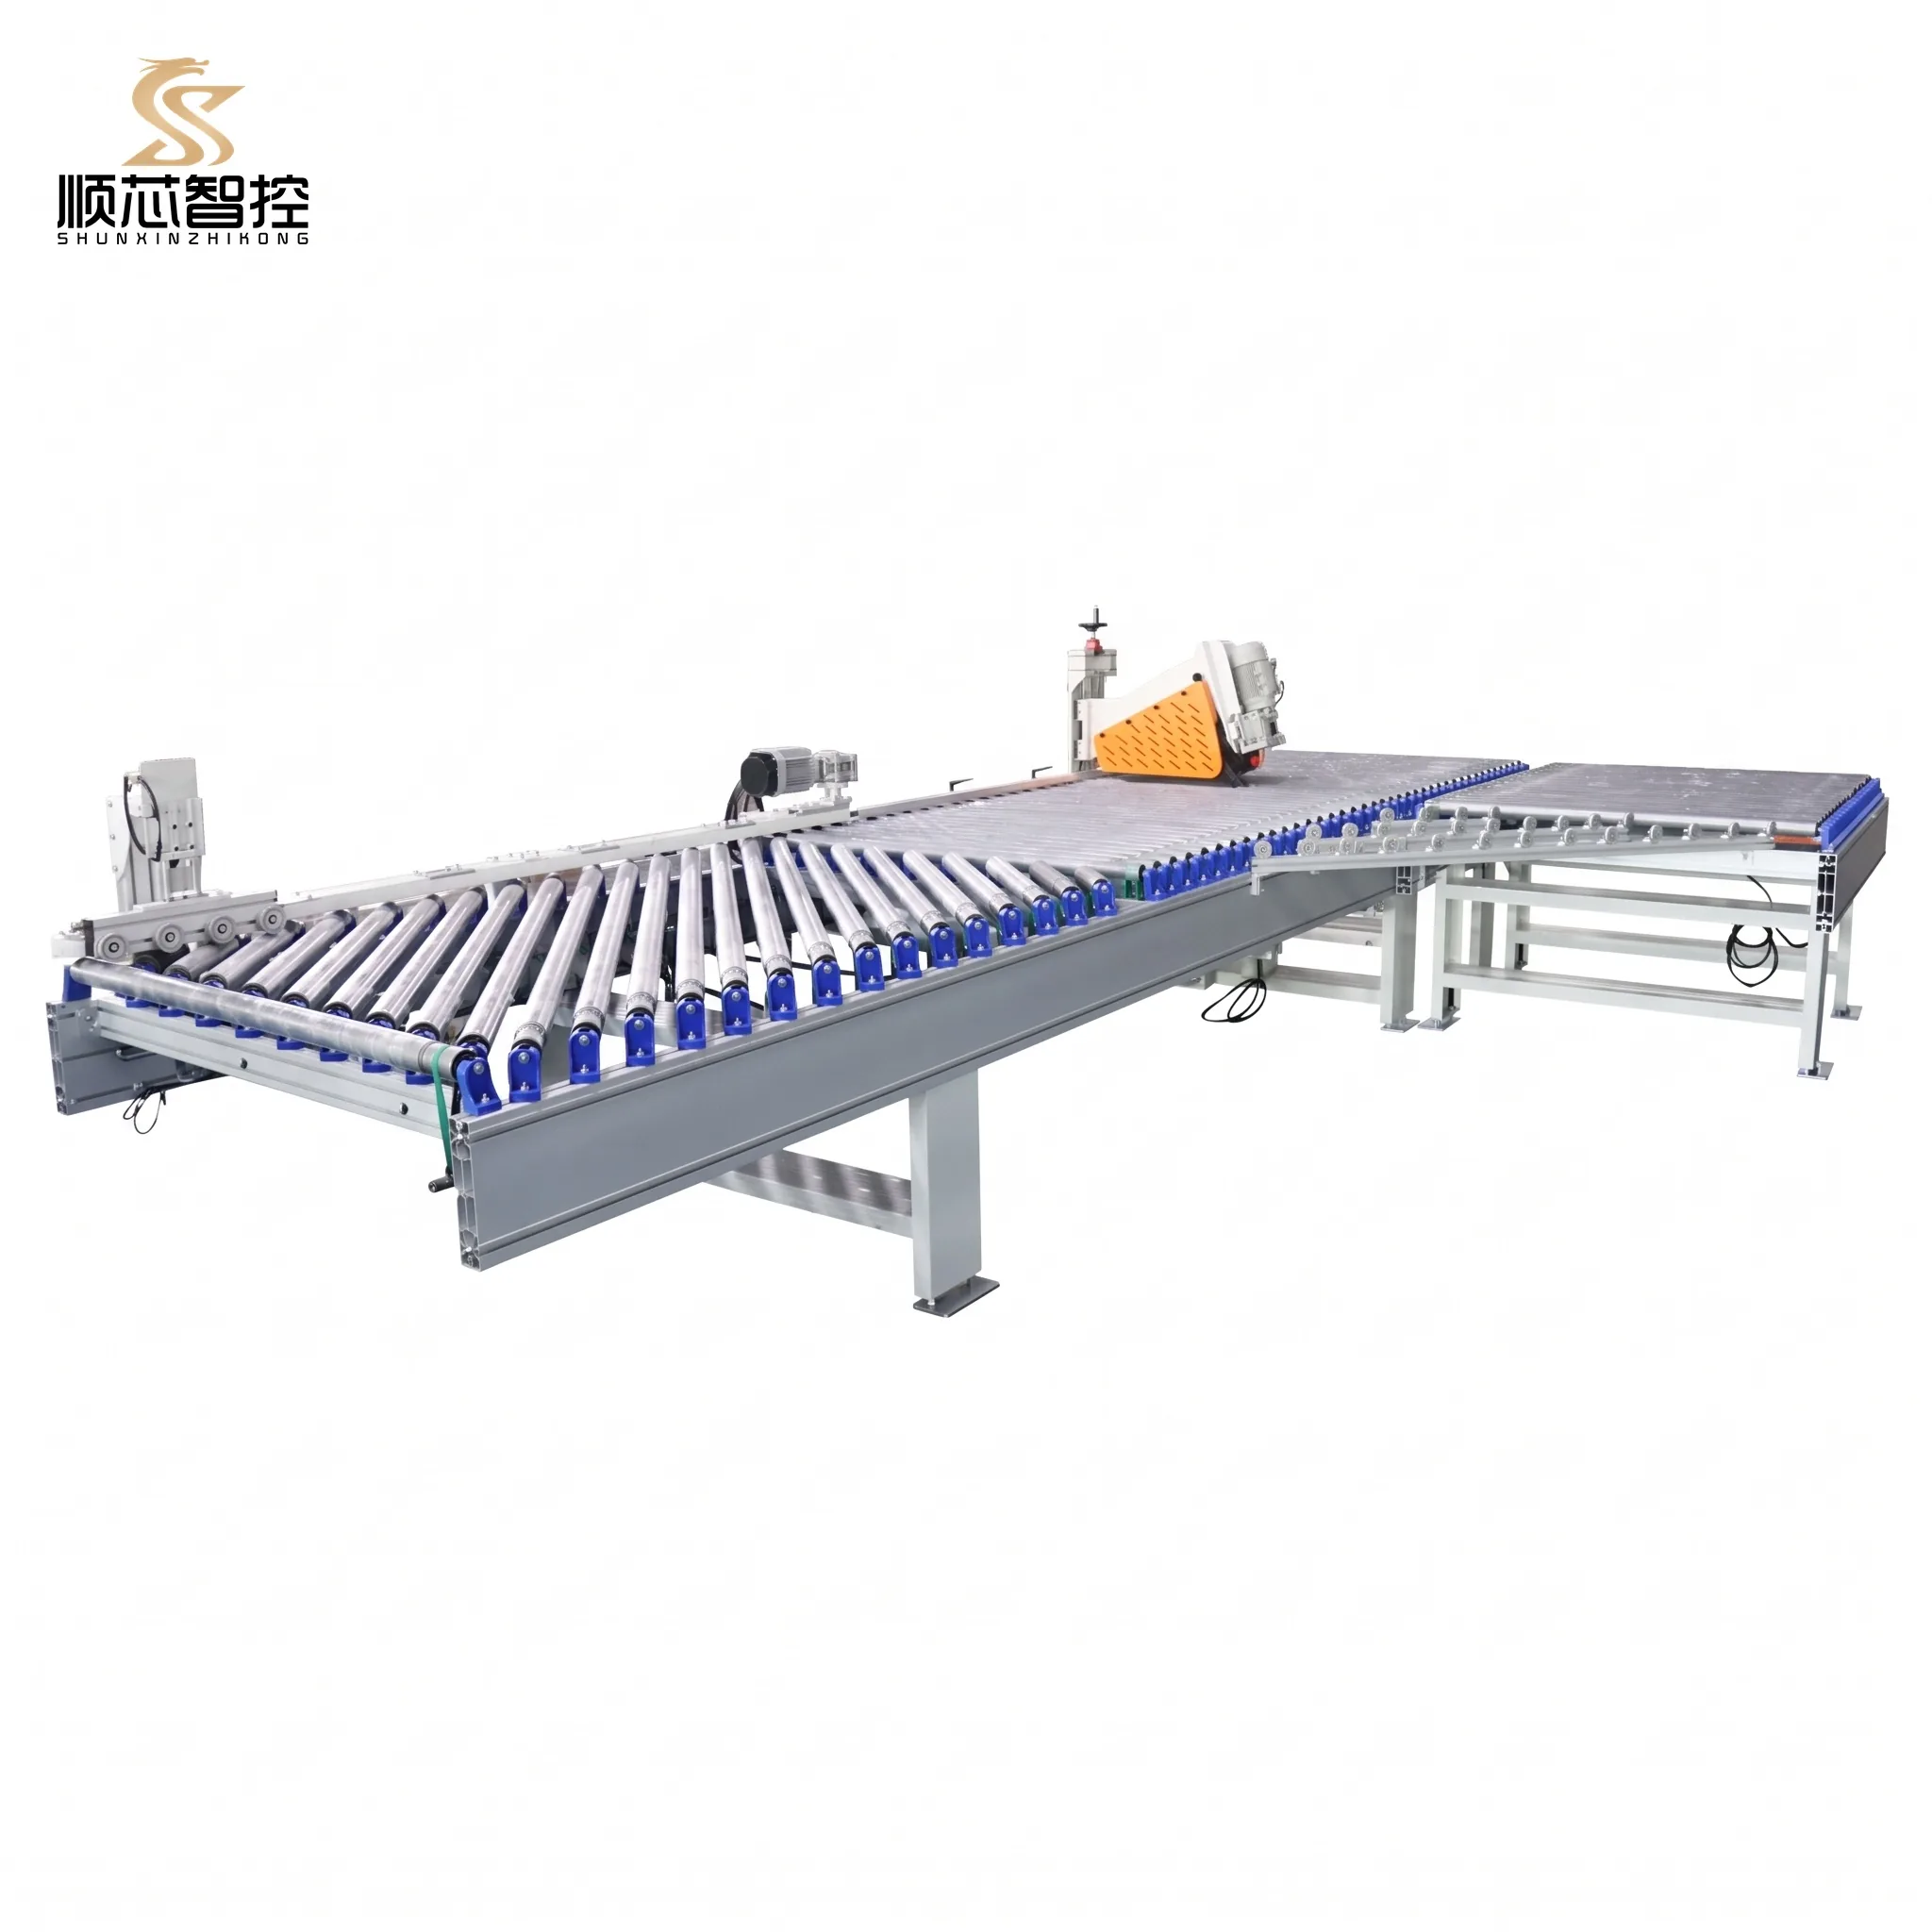
Angled rollers automatically pull returning panels flush against the side datum fence, delivering boards right into the operator's hands aligned for the next pass.
Drill A: Small Drawer Components ($250 \times 120 \text{ mm}$)
Small pieces are the most prone to skewing. Have the operator watch how the powered side-pusher and close-pitch galvanized rollers maintain square alignment without board tilting.
Drill B: Heavy 2400mm Wardrobe Panels
Long door gables shift their center of gravity dramatically as they emerge from the bander:
- Rule: Never pull panels manually from the discharge mouth. Let the powered outfeed bed accept the board weight.
- Observe how pop-up lifting belts gently transfer the panel sideways with zero edge chipping.
Drill C: Delicate PET & High-Gloss UV Panels
Inspect the returning panel surface under oblique factory lighting. Prove to the operator that polyurethane non-marking coated rollers and air-cushion transition zones leave zero scratches, eliminating the old habit of manually placing scrap cardboard underneath boards.
Phase 4: Daily Shift Inspection Protocol (Minutes 100 - 120)
Before granting full independent operator status, review and post this 5-point shift inspection checklist near the electrical cabinet:
| Inspection Item | Frequency | Operational Standard | Action If Out of Spec |
|---|---|---|---|
| Main Air Pressure | Start of every shift | 0.6 - 0.8 MPa stable | Adjust regulator knob; verify compressor |
| Photoelectric Lenses | Twice daily (morning/midday) | Clean optical path, green LED | Wipe clean with dry cloth or air gun |
| Drive Belt Tension | Weekly routine | No slippage under max panel load | Tighten motor tensioning bolts |
| Polyurethane Roller Skin | Weekly routine | Clean surface, zero glue residue | Wipe clean with solvent-free adhesive cleaner |
| E-Stop Wire Response | Weekly routine | Instant full-line cutoff within < 0.3s | Lock out machine; alert electrical technician |
Measurable Shop-Floor Payoff
By investing just two focused hours in systematic operator onboarding, plants routinely achieve:
- Immediate 60% Labor Savings: Reallocating 2 manual catchers to packing or drilling lines.
- Consistent Cycle Rhythm: Operators achieve a continuous flow of feed $\rightarrow$ rotate $90^\circ$ $\rightarrow$ re-feed $\rightarrow$ finished palletizing, maintaining a steady output of $1,200 \text{ to } 1,800$ panels per shift.
- Zero Surface Rejects: Eliminates scratches caused by manual board dragging and cart stacking.
If your plant requires custom CAD layout planning, host machine electrical hookup drawings, or bilingual operation manuals, contact our engineering team directly.
All automated loop return procedures and electrical sensor alignments must adhere to standard workshop lockout-tagout (LOTO) protocols and host machinery manufacturer guidelines. Shunxin equipment includes universal dry-contact interlocks to ensure immediate emergency stop response across synchronized production lines.
Need a Custom Layout Drawing & Quotation for Your Workshop?
Send us your workshop dimensions or CAD floor plan. Our mechanical engineers will deliver a synchronized layout proposal and payback calculation within 24 hours.